|
The CooRecorder program is used for registration of coordinates collected from images. CooRecorder is a general program to register coordinates for groups of points collected from an image. A short text (label) can also be attached to each such group. The program is mainly used within dendrochronology to calculate ring widths. Lately CooRecorder has been extended to also measure blue color from tree rings. This section will show various mechanisms and tools for registration and calculation on tree ring data. To be strict, we do not register tree ring widths (!) with CooRecorder, instead we SAVE YOUR POINT COORDINATES which we then process. This implies that you can easily return to an old registration and adjust it - which is a great plus for this method. |
Working procedure when using CooRecorder
|
CooRecorder might display a Setup Window for project paths at startup. I.e. a place where you can specify addresses
to various places with data in your PC. For now we do not need that mechanism. If that window anyhow pops up, you may best click the Cancel button!
(There is a separate section to read on project files: Using project files to ease backup of .pos files) |

|
First thing to do after starting CooRecorder is to open an image file. Click "File" in the menu bar and select "Open image file for new coordinates".
Select one of your .jpg, .gif, .bmp, .png or .tif files.
When the file is loaded, a new window automatically comes up. (If it does not come up, click the command "DPI and data-type" in the very right-most end of the tools menu bar, see below.) |

|
Please see that "Show data modes for dendrochronology" is checked (as shown above) and also see that the radio button "Measure ring widths...(Sorted data)"
is selected. Also see that the appropriate DPI value is properly set, if not please adjust! (Usually not necessary for .jpg files.)
Note: A common problem for new users of CooRecorder has been to select the correct data mode for their input of tree ring border points. Even when the right mode has been preselected, some users have selected a raw data mode or even the "Curve data" mode. After that setting, almost no tree ring measurement mechanism worked properly in CooRecorder. |
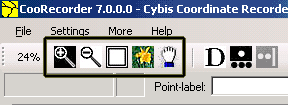
There are five buttons (and two scrollbars) to control the view of your image:

|
A magnifying glass, a demagnifying glass, a fit on screen button, an actual pixels button and a
hand tool button (for dragging the image over your screen).
The scroll bars are only shown when the image does not fit on the screen.
To the left of the magnifying glass is a percentage indicator showing the current magnification of your image. 100% means that one pixel in your image is shown as one pixel on your screen. The magnification glass is a "zoom in" button. First click on the zoom button to select the tool. Then click on the appropriate
point in your image. The view will zoom in an extra 50%. Click again to zoom more. You can set the magnification as a percentage number
if you click in the field to the left of the magnification glass in the tool bar.
Click on the demagnifying glass to zoom out of the image.
To drag the image across the screen, first click on the hand tool button (or click the H key). Then using the left mouse button, click anywhere within
the image and keep the mouse button pressed down. Then move (drag) the mouse with the button still pressed.
|
Recording

(You may also press the D key on your keyboard.)
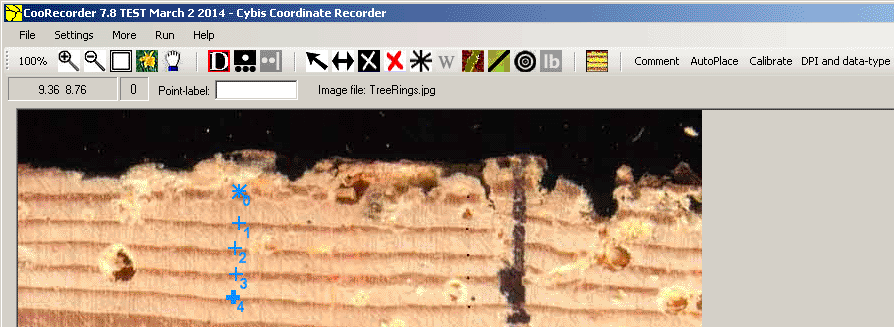
Start recording by clicking on points on your image. The recorded points will be marked with plus signs. When you set a new point it first looks bolded. This is to signify that this point is now "the Selected point". The Asterisk point or The Youngest point. The first point you set within a new measurement series, will look as an asterisk (see point 0 above!).
It is intended to indicate the youngest point in your point series, i.e.
the outermost point in your sample. If you delete this asterisk point, you have to assign that "asterisk property/youngest point property"
to another now outermost point.
The above image shows a straight line of measurement points. But usually it is not possible to follow a straight line... |

Jumping to a new starting point.You may also use the right mouse button to change between these two modes! Then you left-click on point 67:1 and on point 67:2. The group mode will switch back automatically to single point mode. This is a very useful method when you have to make a jump in your measurements when ring widths are laying aslant on the picture. Of course, if tree rings are not very concentrical you have to be careful when interpreting your data if you have moved your radii of measument within the stem! |
Recording modes
|
There are basically two recording modes in CooRecorder and three commands/buttons for switching between them:
When measuring tree rings, CooRecorder automatically turns back to "single-point-per-ring" mode after you have set that extra starting point ("67:2" above).
When necessary, you may switch between these two modes while recording. For fast switching, click the mouse right button while having your cursor on the image and keep an eye on the look of the corresponding button in the tools menu. |
|
There are a number of buttons for editing (changing) what you have recorded:
Note: From version 7.8 of March 2014 you may use the "Ctrl-arrow-key buttons" to stepwise move the selected point in any of four directions!
|

How to split a single point into a pair without loosing the original position.This is useful when you want to change the startpoint for the next series of points as you do not have to delete your last single point - you will just replace it automatically with the first point of a new pair. |
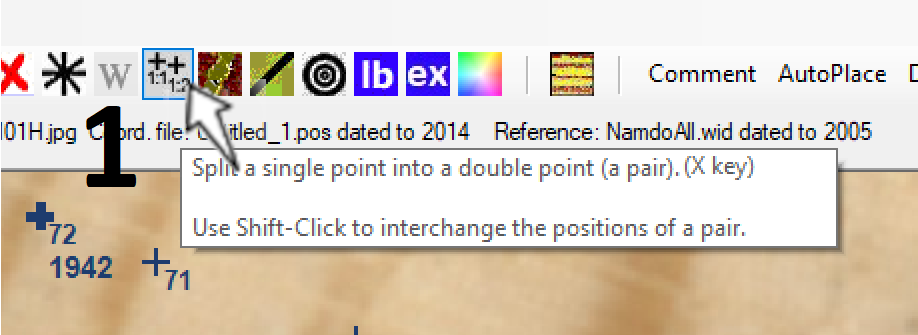 1. See that point 72 is selected.
| 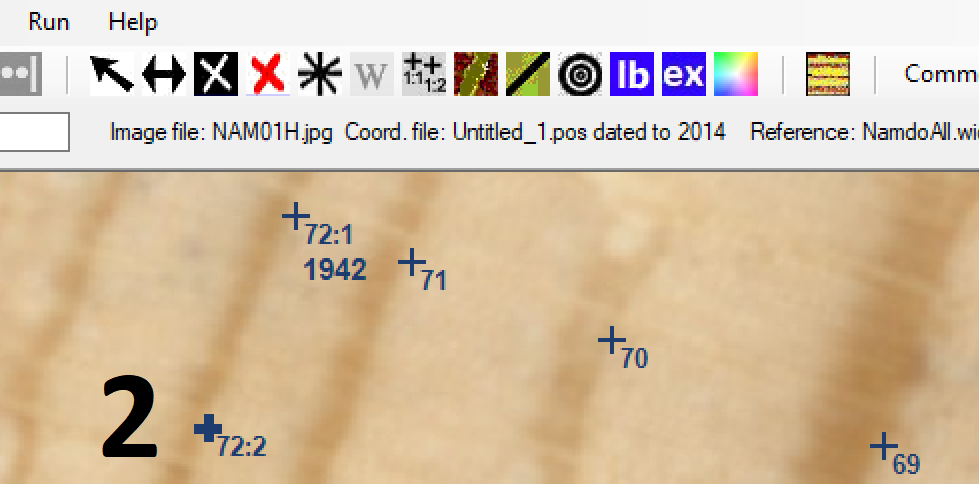 2. Now click the position where you want 72:2 This way you get 72:1 exactly where your old point 72 was placed. |
To get higher precision, use the DH tool to set points manually when rings are tortuous and have diffult paths.

|

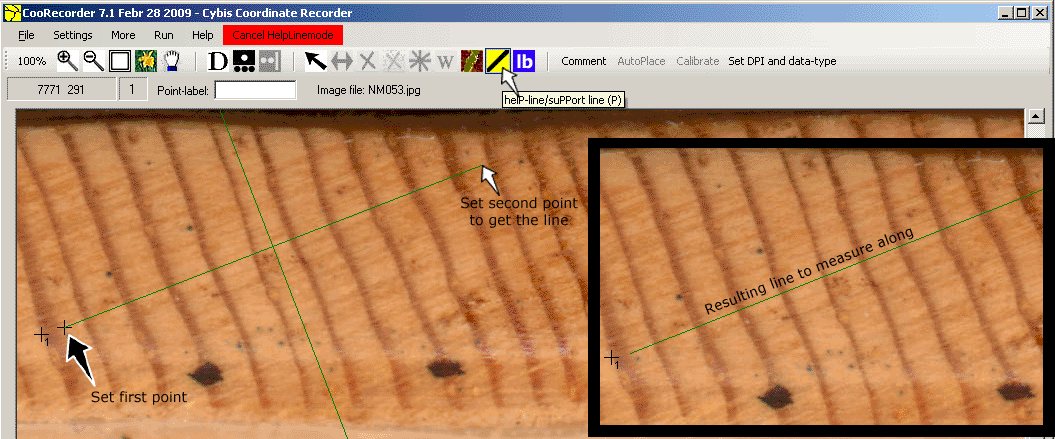
Using a HelP line to measure along a line

| You may set sort of a ruler/Help line/Support line. You can then measure along that straight line! To make the help line drawn, first click on the help line icon as shown above or press the P or Q key on your keyboard. The icon will then light up as shown below. |
|
When the help line is being set, perpendicular crossing lines are also plotted. When these crossing lines are in parallel with the tree rings, you have the best position for your line.
|
DataH-mode - A "cursor" to help you measure perpendicular across the next ring
Easy switching between D- and DH-input mode

| The "DataH-mode" is available (toggle) by right-click on the D-icon. You can also access it by doing CTRL-Right-Click and thus quickly switch between D and DH modes. This gives you a "cursor" with perpendicular help lines growing from a previous already selected point towards the next point to set. |
Unexpected interchange of pairs (not a common problem)Settings menu: "When sorting points, do not swap e.g. 15:1 with 15:2 when 15:2 is more near to 14." Old versions of CooRecorder have allways sorted also the pairs of a dendro group (=2 points) so that the one nearest to the previous point
is placed first and that one with a longer distance to the previous point is placed second (after). That way of sorting sometimes
became wrong when a sample was broken (so that you wanted to jump backwards) or when the sample was of oak.
When measuring oak you sometimes want to step backwards into a
neighbour beam in the wood to continue measuring the ring sequence from that point. For pine that is not the very typical case.
|
When dragging an image...When dragging an image across your screen, B-values and point numbers can now be suppressed to lessen flickering problems. This option can be turned on/off from the Settings menu, see "Settings/Show B- and PointNumbers when dragging with your mouse" |
| CooRecorder: Blue channel calculations now honour Crackmarks so they can be used to exclude parts of a ring (typically earlywood or whole ring) |
 |  |
|
Get high precision when setting Seasonwood points (W) and crackMarker points (M-command, indicated by %gap):
|


When too many numbers are shown:
Thus the plus "point characters" can be made visible alone on an image! |
 There is a disable button - the red cross.
 There is also a youngest point button or the Asterisk button.